User Manual
Basic Usage
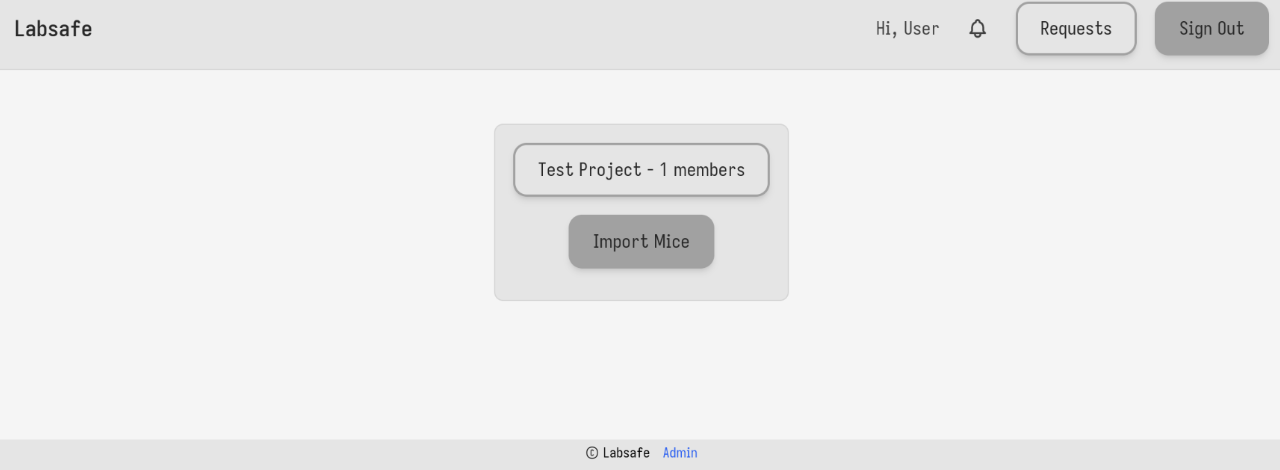
Upon logging in, an interface similar to that shown above is presented, including a list of projects.
Clicking a project in the list presents the project page. Information about the project’s compliance with the license is present, along with a list of mice associated with the project and buttons for various actions.
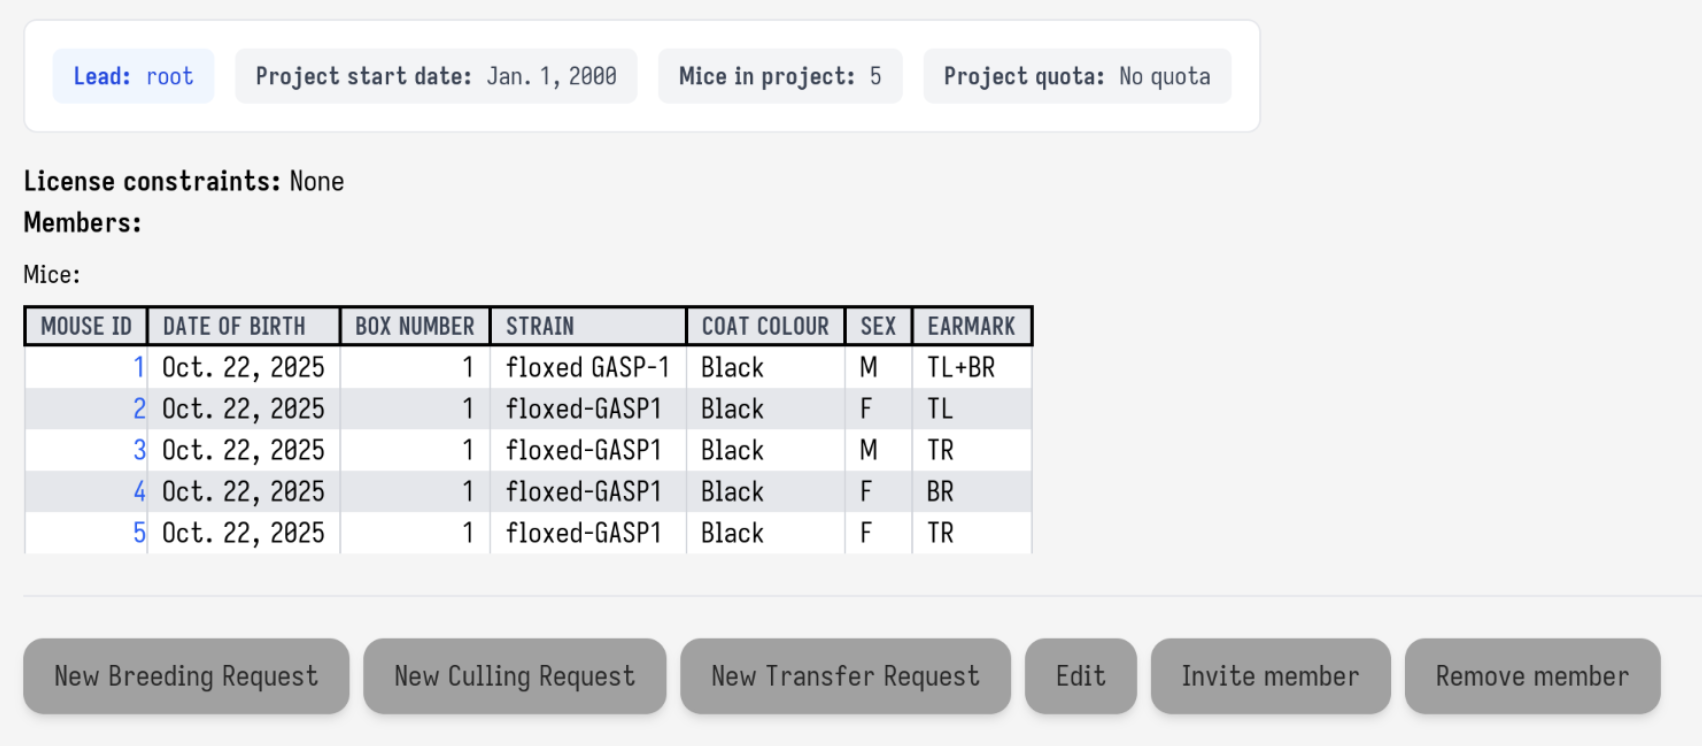
An individual mouse’s page is accessible by clicking the mouse ID in the list of mice on a project’s page. More information about the individual mouse is listed there, alongside links to edit that information and to view its family tree.
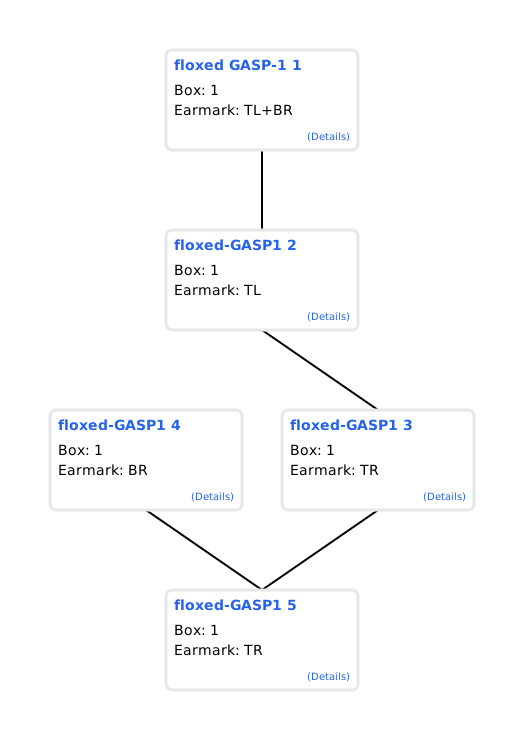
In the family tree view each mouse is represented by a box headed by its strain and tube number, acting as a link to that mouse’s own family tree. The box also includes a details link directly to the mouse’s information page.
Panning the family tree is supported by clicking and dragging, and zooming by scrolling. When a mouse is hovered, its direct ancestors are highlighted.
Study Plans
On the project page, a `Create Study Plan' button can be found. Pressing it yields a form containing the basic data of a study plan: its description, start date, end date, quotas of mice expected to be used, and whether the mice are expected to be internally sourced.
Once created, study plans can be seen in a list on the project page, with their description, start date, end date, and status, which begins as `Draft'. Following the link in the description yields the study plan page, from which they can be edited or, if the user has permission to do so, approved with a study ID.
Data Import
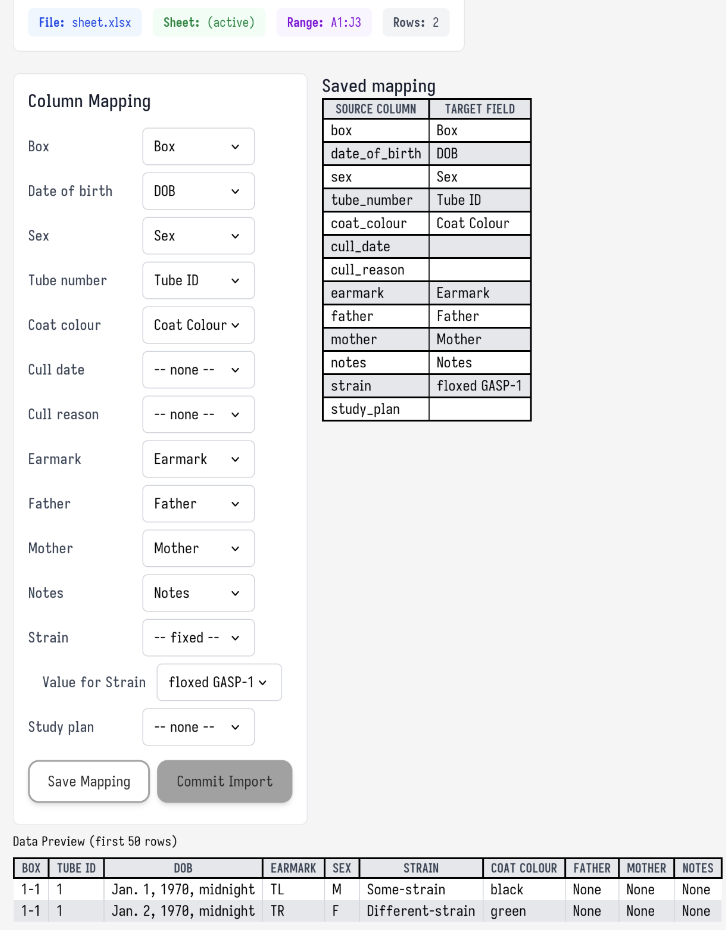
The data import feature is most suitable for data structured as shown below, though more columns may be provided.
Parent fields refer to the tube number and are assumed to refer to
mice of the same strain as the child. Sex is expected to take values
of either
M
or
F. Blank values are assumed to be equal to the previous filled value.

Data import begins by uploading an Excel spreadsheet to the data import page linked from the front page. The project to which the mice should be added must be chosen.
On the next page, the sheet within the Excel file from which the data should be taken must be specified, as must the cell range within that sheet.
The cell range must be specified to include the heading row. In a
sheet structured like the example above, the relevant range would be
A1:H2.
On the next page the mapping of columns must be given.
Simply select the corresponding column or
-- none --
if the column is not provided.
In the case of the strain, the value
-- fixed --
can also be selected if the spreadsheet does not contain it in a
column.
Some columns will have automatically-inferred mappings prefilled.
Once a mapping is chosen it can be saved and the import can be committed, finally adding the mice.
Requests
Requests can be created using the buttons on a mouse’s page or on a project’s page. If created from a project page, a mouse must then be chosen.
Additional relevant details should then be provided such as the location to which a mouse should be transferred or the reason for which they should be culled.
Once created, requests appear on the related mouse’s page and on the general Requests page accessible from the title bar.
The general requests page can be filtered using the Status and Type dropdowns. Filters selected do not apply until the Filter button is pressed.
Pending requests can be accepted or denied, and accepted requests can be marked completed if the user has permission to do so.
On an individual request's page, messages can be sent in reply to the request.
Administration
Projects can be created with the Create Project button on the home page, if the user is authorized to do so. The project's name, lead, start date, and license constraints must all be specified. The project lead must be specified by email address. If no such user exists, an invitation will be sent to allow the user to register. 'Quota 5 years' refers to the number of mice a project is permitted to use in the span of 5 years.
Users can also be added to the system by invitation from a project lead or administrator, by inviting a member to collaborate on the project. This again sends the user an invitation to allow them to register.
To grant a user animal facility permissions (full access to all projects and to create projects), the admin page, found under the `Admin' link in the footer, is used. On that page, follow the `Users' link to reach a list of registered users, find the user who should be granted these permissions, and follow the link in the `Username' column. Then, under `Permissions', a list of `Available Groups' can be found, in which `Animal Facility User' should be present. Double-clicking it moves it to the `Chosen Groups' list. These changes can then be saved with the `Save' button at the bottom of the page.